
Ready to turn a dream into a real tiny house? This friendly guide helps you shape a practical plan that fits your lifestyle and budget. Start by listing what matters most and sketching rough layouts to find functional zones.
Mobility and smart space use are the big benefits of a house on wheels. Sizes range from about 80 to 400 square feet, so foldaway furniture, wall storage, light palettes, and large windows make living areas feel open.
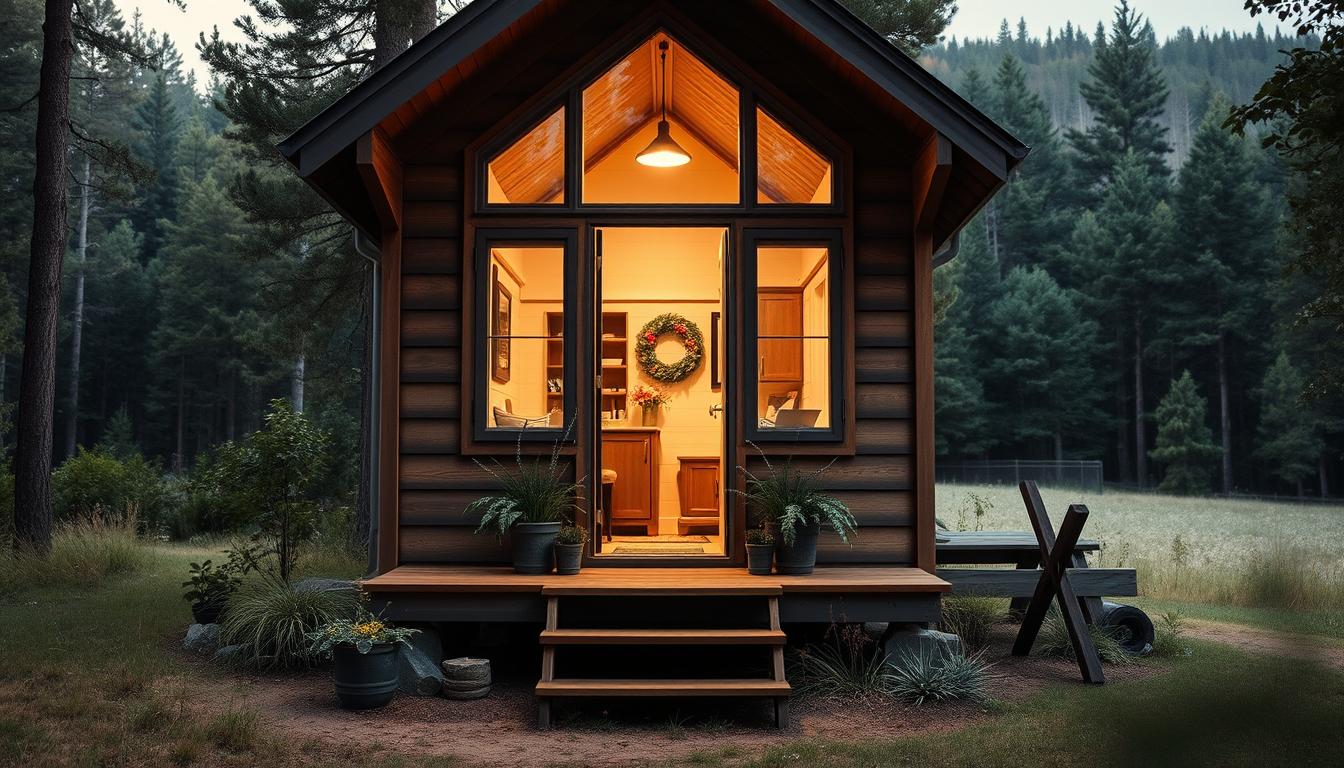
Early planning should include zoning, road rules, and permits. Many builders add a deck to expand living outdoors. Off-grid systems like solar let you build for remote life while a trailer keeps options mobile.
Budget wisely: DIY work can lower cost, but factor in tools, materials, and a 10–15% contingency for surprises. This guide walks through planning, trailer and framing basics, energy and water systems, codes, and when to hire pros.
Key Takeaways
- List needs early and sketch layouts to guide planning.
- Use multi-use furniture and light finishes to expand perceived space.
- Check zoning, road rules, and permits before you build.
- Plan budget with tools, materials, and a 10–15% contingency.
- Decide if off-grid systems or mobility fit your lifestyle.
- Know when to DIY and when to hire pros for safety and code compliance.
Start With Your Why: Goals, Lifestyle, and How You’ll Use the Space
Start by naming the main role this tiny house will play in your life—primary residence, guest unit, or an on-the-road refuge. That decision guides size, systems, and legal needs. Jot down daily routines and must-have areas before sketching floorplans.
Map real use, not idealized scenarios. Note work habits, pet needs, hobbies, and how often you cook or host. These choices affect power, water, and storage demands.

- Decide whether mobility matters; road rules change trailer systems and parking options.
- Plan an outdoor deck or gear closet if outdoor living expands usable space.
- Test the lifestyle by spending nights in a small unit to see what you keep and what you discard.
| Purpose | Key design factors | Typical systems |
|---|---|---|
| Full-time house | Bigger kitchen, storage, insulation | Grid power or robust solar, full plumbing |
| Guest unit | Compact comforts, easy access | Minimal utilities, simpler hookups |
| Travel-ready THOW | Lightweight framing, secure storage | Mobile trailer spec, off-grid options |
Sketch ideas and test layouts with simple mockups. Keep the focus on real living needs so the build matches your dream.
Tips for Designing Your Own Portable Home
Begin by listing what each living zone must do so the small footprint meets daily needs. This step keeps planning practical and prevents wasted time during building.

Map your zones
Make a short checklist for each area:
- Kitchen: counter run, appliance clearances, task lighting, routing for plumbing.
- Sleeping loft: mattress size, headroom, ladder or stairs with built-in storage.
- Living nook: seating that doubles as storage or a guest bed.
- Bath: compact fixtures, ventilation, and water lines in an accessible chase.
- Deck: grill zone, seating, and exterior lighting to extend living space.
Test layouts with tape
Use masking tape to lay the floor at full scale. Walk the route, open doors, and check clearances.
This hands-on check finds tight spots before you commit to walls or cabinetry.
Grow perceived square feet
Prioritize vertical storage and multi-use furniture to free the floor. Choose light palettes and bigger windows to brighten the interior.
Pick lightweight but durable materials to keep trailer weight down while keeping longevity high. Reserve time to iterate—small tweaks to dimensions often yield big gains in comfort and storage.
Smart Space Planning: Floorplans, Dimensions, and Storage That Works
Begin by mapping daily routines to defined areas so every square foot earns its place. Start with a realistic view of how you live and move. This shows where circulation, seating, and counters must sit.

When to adapt a plan or start fresh
Many tiny house plans range from rustic to modern and already include lofts, kitchens, showers, and composting toilets. Evaluate pre-designed plans for speed and cost efficiency.
Adapt with a local architect or engineer when site, codes, or load limits differ. Go custom when lifestyle needs diverge significantly.
Multi-function furniture and hidden storage
Use sofa beds, fold-down tables, and lift-top coffee tables to stretch living areas. Scale furniture to the room so pieces don’t overwhelm the floor.
Integrate hidden storage in stairs, toe-kicks, benches, and wall cavities. Keep daily items accessible and seasonal gear tucked away.
- Right-size the floor plan to balance circulation and storage within your target square feet.
- Check loft headroom, stair clearances, and appliance fit early to avoid costly changes.
- Pick lightweight, durable materials in high-traffic areas to protect the trailer and simplify upkeep.
| Area | Key check | Quick solution |
|---|---|---|
| Loft | Headroom | Raised bed with under storage |
| Kitchen | Work triangle | Compact appliances, pull-out counters |
| Entry | Traffic flow | Bench with shoe storage |
Exterior Choices and Trailer Fundamentals for Homes on Wheels
Choosing an exterior skin and a rated trailer early sets the stage for a safe, long-lasting tiny house. Pick cladding that travels well. Dark Colorbond steel with wood accents looks industrial and sheds road grime.

Picking travel-ready cladding and details
Durability matters more than trends. Use vibration-rated fasteners and sealants at openings. Flashing around windows and doors reduces water intrusion when you tow.
Trailer size, wheel wells, and leveling
Specify trailer dimensions early. An example deck of 2.3 m by 8 m gives generous outdoor space. Wheel wells can lower the floor to increase interior ceiling and usable space.
Insist on a professionally engineered trailer with rated axles, brakes, tie-downs, and foldaway jack stands at each corner for leveling and plumbing function.
Subfloor trade-offs
Using the trailer as the subfloor raises ceiling height and cuts cost but creates thermal weak spots at tanks and steel. A framed subfloor adds weight and lowers ceiling slightly yet improves insulation continuity and energy performance.
- Plan exterior storage for propane and service access.
- Secure appliances and furniture against travel loads.
- Balance weight, insulation, and life-cycle durability when choosing materials.
Framing for the Road: Walls, Roof, and Structural Integrity
Roadway forces change how walls and roofs must be built and tied to the trailer. Framing a tiny house to travel means thinking in motion: vibration, braking, and lateral loads alter load paths and stress points.

Stud spacing, bracing, and millimeter-precision
Use top and bottom plates, studs, jack and jamb studs, noggings, and shear bracing to stop twisting.
Keep stud spacing tight—target about 450 mm—and specify millimeter-level dimensions so panels line up and insulation remains continuous.
Working with experienced contractors
Hire builders who know tiny house loads and relevant codes. Communicate anchor points, trailer tie-downs, and travel requirements early.
Plan penetrations and ceiling openings to avoid weakening critical areas. Use consistent wood and quality materials plus structural adhesives with mechanical fasteners to resist vibration.
| Component | Key dimension | Recommended action |
|---|---|---|
| Studs | ~450 mm spacing | Millimeter layout, tight fasteners |
| Shear bracing | Plywood or steel strapping | Continuous load path to trailer |
| Ceiling | Coordinate with tie-downs | Reinforce around openings |
Systems Made Simple: Electrical, Energy, and Off-Grid Readiness
A reliable off-grid setup begins with simple math: watt-hours per day, sun hours, and a safety buffer. List every load and realistic hours of use. Sum daily watt-hours, divide by average peak sun hours, then add ~40% to cover inefficiency and cloudy days.

Separate circuits make life easier and safer. Use 12V runs for lighting and USB, and reserve 120/240V through an inverter for appliances. Size the inverter for both continuous draw and surge loads.
Include a distribution board with a main breaker and labeled sub-circuits by zone. Apply I = W/V to check amperage (a 1050 W toaster at 120 V draws 8.75 A). This math guides wire size and breaker selection.
- Right-size panels and batteries from total daily watt-hours plus ~40% buffer.
- Keep low-voltage lighting separate; pick an inverter with adequate surge capacity.
- Choose efficient appliances—induction cooktops and high-EER HVAC—to cut battery needs and cost.
- Seal and insulate well to lower heating/cooling loads and simplify maintenance.
Document wiring, label breakers, and protect penetrations against vibration. Clear diagrams save time during living and future repairs in a tiny house or small house build.
Water, Plumbing, and Gas Safety in a Smaller Footprint
Compact plumbing and smart water routing keep systems light, efficient, and easy to service in a small living space. Use PEX runs and brass elbows to cut weight and speed installation. Exposed interior runs make access simple and match an industrial aesthetic.

Pair low-flow fixtures with a tankless gas heater to save water and avoid bulky storage tanks. Add a hose inlet for on-site hookups and a gutter-fed inlet with a one-way valve to fill a medium storage tank when allowed.
Greywater and off-grid collection
Route used water to an under-trailer greywater tank. Discharge only where legal, or filter for irrigation during rain events. A pressure pump keeps steady flow to fixtures and reduces stress on fittings.
Gas setup and safety
Specify dual propane tanks with auto switchover and easy access. Run lines visibly where possible, use flexible connectors at appliances, and secure piping against vibration. Install a gas detector near living areas and test it regularly.
- Keep lines serviceable: exposed runs and quick-access shutoffs make maintenance less disruptive.
- Protect against vibration: secure piping and use brass or flexible connectors at junctions.
- Routine checks: inspect fittings, valves, and detectors to prevent small leaks from becoming major damage.
Know the Rules: Building Codes, RV/Caravan Laws, and Parking
Decide early whether your project will be a travel trailer or a foundation build. That choice sets the legal path, the inspections needed, and which codes apply to the final structure.
THOWs typically fall under RV or travel trailer regulations, not residential building codes. Third-party certs such as NOAH and Pacific West Associates help meet RV standards. These certifications can ease insurance, parking, and towing discussions.

Zoning and parking rules differ by city and county. Some areas allow living in a tiny house on a private lot; others limit occupancy or forbid long-term parking. Road laws set maximum weight and size limits in feet and inches to avoid escorts and permits.
“Treat regulatory review as part of the build. Early checks cut redesigns and costly delays.”
- Decide THOW versus foundation early and gather applicable codes.
- Seek NOAH or Pacific West certification if you aim to keep the unit under RV rules.
- Talk with planning staff about local laws, parking areas, and lot restrictions.
| Build type | Regulatory path | Common checklist items |
|---|---|---|
| Towed tiny house | RV/travel trailer codes; third-party certs | Trailer rating, NOAH/Pacific West, road size limits (feet) |
| Foundation house | Local building codes, inspections | Permits, foundation plans, standard building codes |
| Parked long-term | Zoning and occupancy laws | Lot rules, utility hookups, site approvals |
Plan documentation and inspections from day one. Keep a compliance binder with certifications, diagrams, and manuals to make moves and inspections smoother and to protect the value of your home.
DIY or Hire Pros: Time, Cost, and Quality Trade-offs
Who does the work affects more than cost — it changes permits, inspections, and future maintenance. Decide early whether you have the time and patience to learn trades or if hiring people makes more sense.

Budget impacts of labor, tools, and the learning curve
DIY can save money up front but often adds time and extra material needs when mistakes happen.
Be honest about tools and skills. Factor in tool purchase, wasted materials, and slower progress when you estimate cost and time.
When to bring in engineers, electricians, and trailer specialists
Hire pros for high-risk systems: structural engineering, trailer fabrication, electrical panels, and gas work. These areas carry safety and code requirements that affect a house and a tiny house alike.
- Consult an engineer for load paths and anchor points.
- Use a licensed electrician for panels and major circuits.
- Book a trailer specialist for rated axles and tie-downs.
| Factor | DIY | Pro |
|---|---|---|
| Cost | Lower labor, possible rework | Higher labor, efficient materials sourcing |
| Time | Longer learning curve | Faster completion |
| Maintenance | More hands-on upkeep | Lower long-term service needs |
“Balance empowerment with risk; short-term savings can become long-term expense.”
Your Next Step Toward a Dream-Tiny Build
Validate layout ideas by spending time in a tiny living setup; real use reveals important changes fast. Sleep a few nights in a small unit, declutter what you won’t use, sketch zones, and tape a full-size plan to check circulation and storage reach.
Meet a local architect or engineer to review plans and code paths, and consider NOAH or Pacific West certification if the house will tow. Build a budget with a 10–15% contingency and map systems with labeled distribution panels and accessible plumbing lines.
Lock in kitchen specs, choose energy-efficient appliances, and prioritize insulation and air sealing. Set a simple maintenance plan for water, filters, and envelope checks so your home stays efficient. Use this guide to move from planning to action and protect your dream life in small space living.
Leave a Reply