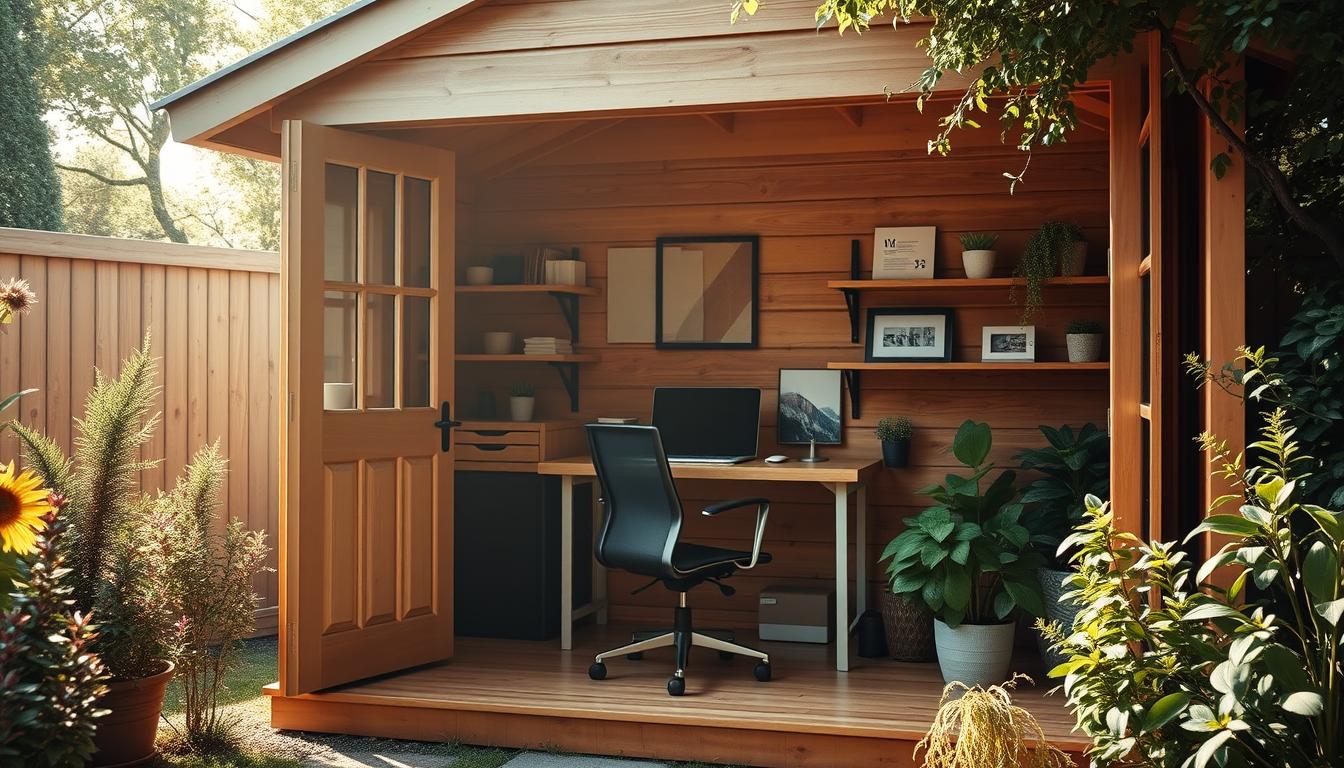
Turning a backyard building into a usable workspace is a smart way to add a quiet place for work without moving house. This short guide explains the first steps, key sizes, and cost ranges so you can plan a practical project.
Start by checking local county codes for any permits before you begin. A minimum near 100 sq. ft. often works well; common footprints include 8×10, 10×12, and 12×16. Budgets vary widely, from roughly $1,500 to $35,000 depending on condition, labor, and features like insulation and power.
Decide whether this is a DIY job or a hired job early on so your timeline stays realistic. Assess existing structures in the garden or backyard, capture before photos, and list must-have gear and comfort upgrades like windows and climate control.
Key Takeaways
- Check county rules and permits before you start.
- Plan for ~100 sq. ft. or more for comfort and function.
- Set a budget range and prioritize insulation, lighting, and power.
- Decide early on DIY versus hiring pros to shape the timeline.
- Document the space with measurements and before photos.
Why a Backyard Office Shed Is a Smart Move Right Now
Turning a backyard building into a private work hub is an affordable way to boost focus and comfort. Remote work trends make small upgrades highly valuable. Even modest changes such as added insulation and larger windows raise productivity and comfort significantly.
Compact footprints like 8×10, 10×10, or 10×12 often serve as a practical starting point. These sizes fit a desk, storage, and lighting upgrades without high costs. A detached setup gives room for calls, meetings, and deep focus away from the main house.
Natural lighting—extra windows, transom panels, or skylights—reduces daytime reliance on electric lighting and lifts mood. Cost-effective improvements like basic electrical, simple flooring, and insulation deliver the best comfort-per-dollar.

| Size | Primary Benefit | Typical Upgrades |
|---|---|---|
| 8×10 | Budget-friendly starter | Window, insulation, outlet |
| 10×10 | Comfortable desk + storage | Skylight, flooring, wiring |
| 10×12 | Better layout options | Built-ins, climate control |
Permits, Placement, and Prep: Start Your Conversion the Right Way
A quick call to your county planning office can save weeks of rework and unexpected fines. Before any demolition or electrical work, confirm whether local shed permits are required for interior changes or new circuits.

Check setbacks, maximum height, and size limits for outbuildings on your lot. If you live in an HOA, review rules about exterior finishes, window additions, and paint before you order materials.
Call 811 to mark underground utilities before trenching for wiring or footings. Verify foundation stability — a level, supported building prevents warped doors and finish problems.
Practical steps before work begins
- Ask your township the key question: are permits needed for this step or just electrical updates?
- Document the current condition with photos and notes for permits and contractor bids.
- Plan placement for privacy, shade, and Wi‑Fi line-of-sight; avoid low garden spots that trap water.
- Stage tools and materials on a clear area of the lot so crews can work safely and efficiently.
One more step: confirm whether changing doors or adding windows triggers an inspection. That check often decides if the project stays DIY or needs a pro.
Plan Your Space: Size, Layout, and Design That Boost Productivity
Start by picturing how you move inside the room—this view guides every layout choice. That simple habit helps you choose the right size and layout for focused work and comfort. A minimum of roughly 100 sq. ft. is a practical step for most users.
What size do you need?
What size shed do you need? From 8×10 to 12×16 and beyond
Pick a footprint that supports your workflow. An 8×10 fits a minimal desk and chair. A 10×12 gives room for seating and storage. A 12×16 allows multi-monitor setups and generous built-in shelving.

Sketch a floor plan: desk zones, outlets, and storage placement
Draft a scaled sketch early. Mark desk clearance, door swing, and a 24–36 inch circulation path. Overlay outlet and lighting locations to avoid last-minute reruns.
Choose a style and exterior look that fits your backyard
Match the building’s look to your yard: gable, barn, or cabin styles work well. Confirm wall heights for useful vertical storage and choose a door type that eases furniture moves.
- Reserve vertical wall zones for shelves to keep the floor open.
- Place windows to reduce screen glare; use shades where light is strong.
- Plan a small niche for a printer and cable pass-throughs to cut clutter.
Last step: if you start with a garden shed shell, account for existing studs and windows so you avoid costly rework later.
Shed to office conversion: light, power, and climate you can count on
Good light, reliable power, and steady climate control make a backyard workspace useful every day. Plan these systems early so each step stays efficient and code‑safe.

Bring in natural light: windows, transoms, and skylights
Add windows, transom glass, or a skylight to maximize daylight and cut daytime electric use. Place glazing to reduce screen glare and boost the room look and mood.
Electrical planning: outlets, circuits, and DIY vs. electrician
Map outlets at desk height and plan dedicated circuits for computers, printers, and small HVAC gear. DIY wiring can cost roughly $100–$600, while hiring a contractor runs about $1,000–$4,000+
- Use GFCI/AFCI protection and locate switch boxes near entries.
- Route power in underground conduit and follow local trench depths.
Insulation that works: foam board, spray foam, and vapor barriers
Choose foam board for an approachable DIY install or spray foam to seal odd gaps. Always include a vapor barrier to prevent condensation and protect finishes.
Heating and cooling options for year‑round comfort
Consider a mini‑split, compact heat pump, or a space heater/fan pair sized to your square footage. Seal doors and windows with weatherstripping to keep energy costs down.
Interior Build‑Out: Walls, Floors, and Finishes that Feel Like Home
Finish work makes a backyard shell feel warm, tidy, and ready for daily use. This last build‑out phase is where material choices shape comfort and durability.
Wall systems: drywall gives an affordable, classic look. Plywood adds strength where you’ll hang shelves or monitors. Shiplap adds a premium style and visual interest for a modern shed office.

Flooring and floor prep
Choose waterproof vinyl plank for a low‑maintenance, resilient surface. Carpet tiles bring warmth where moisture risk is low.
If you prefer laminate or engineered hardwood, add a moisture barrier and stable subfloor to protect the material and prolong life. Floor paint is a low‑cost option for a simple, fresh look.
Paint, trim, and the final step
Prime and paint walls in light, neutral tones to boost brightness. Install simple trim and caulk lines for a polished finish that feels like part of your home.
- Back plywood key mounting zones for future flexibility.
- Fit window treatments to control glare and temperature.
- Deep‑clean surfaces, vacuum all corners, and mop floors before moving in.
Final step: treat this phase as the last polish. Good finishes and a thorough clean make the shed office feel like a durable, inviting workspace.
Security, Safety, and Code Considerations for Your Office Shed
A secure setup protects gear and keeps everyday work reliable. Start with a strong door and quality locks to deter break‑ins. Add a simple camera and motion lights if the garden placement sits out of view.
Life safety matters. Keep a small fire extinguisher and a first‑aid kit near the entry. Label electrical circuits and fit required GFCI protection. Follow local electrical code and call a pro when wiring falls outside your skillset.

Practical actions that reduce risk
- Install a sturdy exterior door with a deadbolt and optional bolt lock.
- Anchor tall shelving and monitors to walls so items cannot tip.
- Use vapor barriers, ventilation, and a dehumidifier to control moisture and protect insulation and office equipment.
- Keep clear egress paths; never block doors or windows with storage.
- Tidy cords with raceways and cable ties to cut trip and heat hazards.
“A few inexpensive upgrades can prevent a costly loss of equipment and halt downtime.”
Review local building rules if you expect clients or will store sensitive files. Reassess locks, lighting, and camera coverage seasonally as your needs evolve.
Furnish, Store, and Organize: Make the Most of Every Square Foot
A well-planned layout combines ergonomic gear and vertical storage so every inch works harder. Start by sketching desk zones, shelves, and outlet locations to prevent layout conflicts and wasted space.

Ergonomic desk setups and seating for focus and comfort
Choose an adjustable chair and an ergonomic desk that fits your body and the room. Position monitors at eye level and use a keyboard tray to keep wrists neutral.
Smart storage: lofts, shelves, and built‑ins
Use vertical storage—open shelves, pegboards, and upper cabinets—to keep the floor clear and the room feeling larger.
- Consider a small loft or overhead racks if ceiling height allows.
- Mix open shelving for daily items and closed cabinets for tidy storage needs.
Connectivity and networking: Wi‑Fi extenders and cable runs
Reliable internet matters for video calls and large file transfers. Test a Wi‑Fi extender, and if speeds lag, run Ethernet from the main building for best results.
Small changes—good lighting, neat cables, and a place for office equipment—make the space feel like a full workroom.
Budget Smarts: Costs, Savings, and Timeline for Your Conversion
A clear budget prevents surprise costs and keeps your timeline on track from permit through move‑in. Start with big lines: insulation, electrical, heating, windows, flooring, and furniture.
Typical cost ranges: materials, labor, and equipment
Estimated totals run about $1,500–$35,000 depending on size, condition, and whether you hire pros or DIY. Use these sample lines when you build a spreadsheet.
- Insulation & interior walls: $500–$2,000+
- Electrical: DIY $300–$1,500; contractor $1,000–$4,000+
- Heating/cooling: $300–$1,200; windows/doors: $500–$2,000
- Flooring: $200–$1,000; furnishings & décor: $300–$2,000
Where to splurge vs. save
Prioritize insulation and air sealing first. Comfort and energy savings repay their cost quickly. Spend on good windows if glare or drafts are an issue.
Save on trim and paint by doing finishes yourself. Buy flooring and fixtures during sales and bundle shipments for lower shipping fees.
Create a realistic schedule from shell to furnished workspace
Block time for permits, site prep, wiring, insulation/drywall, flooring, and move‑in. Allow extra days for contractor quotes and inspections.
Tip: track expenses against your step guide and pause scope changes if costs climb.
Your New Workspace Awaits: From Garden Shed to Productive Home Office
A clear process and small weekend projects turn a garden building into a focused work hub. Follow your step guide: verify permits, map outlets and lighting, then finish insulation and flooring.
Bring plans into action by prioritizing natural light, reliable power, and smart storage. Tweak layout after a week of use and refine ergonomics and cable runs for a polished result.
Keep a short list of upgrades for later, like better glazing or a mini‑split. Celebrate the new routine: a short walk across the lot creates a real mental shift into work mode.
Save your budget notes and materials list so maintenance and future upgrades stay simple and well documented.
Leave a Reply